


Transform your hair care routine with the luxury of a homemade hair spa, right in the comfort of your own home. Achieving healthy, shiny, and strong hair doesn’t require expensive salon visits. With simple, natural ingredients and a little time, you can create a deeply nourishing hair spa experience that revitalizes your hair from root to tip. This guide will walk you through each step to create your own effective Homemade Hair Spa At Home, leaving you with salon-quality results without the salon price tag.
Why opt for a homemade hair spa at home? The advantages are plentiful. Firstly, it’s incredibly cost-effective, using ingredients you likely already have in your kitchen. Secondly, you have complete control over the ingredients, ensuring you’re only using natural and wholesome products, free from harsh chemicals often found in commercial treatments. Lastly, it’s supremely convenient. No need to book appointments or travel; your personalized hair spa is ready whenever you are.
Let’s begin crafting your homemade hair spa experience:
Step 1: Nourishing Oil Massage
The foundation of any effective hair spa is a deeply penetrating oil massage. This step is crucial for boosting blood circulation in the scalp, which in turn stimulates hair follicles and promotes healthy hair growth. For this step, you’ll need a blend of nourishing oils.
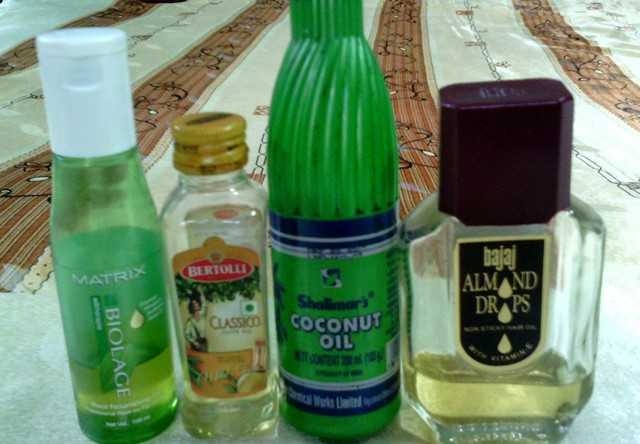
Ingredients:
- 2.5 teaspoons Coconut Oil: Known for its deep moisturizing properties and ability to penetrate the hair shaft.
- 2.5 teaspoons Almond Oil: Rich in Vitamin E, it adds shine and strengthens hair.
- 2.5 teaspoons Olive Oil: Packed with antioxidants, it promotes scalp health and adds luster.
- 2.5 teaspoons Sunflower Seed Oil (or your preferred hair oil): Light and easily absorbed, providing essential fatty acids.
Instructions:
- Combine all the oils in a bowl.
- Gently warm the oil mixture. Warm oil penetrates the scalp more effectively than cold oil. Be careful not to overheat; lukewarm is ideal.
- Using your fingertips, gently massage the warm oil into your scalp in circular motions for 15-20 minutes. Focus on covering the entire scalp and then work your way down to the lengths of your hair. A relaxing head massage not only feels great but also maximizes the benefits of the oil treatment.
Step 2: The Hot Towel Steam Treatment
Following the oil massage, the hot towel treatment is essential. The warmth from the towel helps to open up the hair cuticles, allowing the nourishing oils to penetrate deeply into the hair shaft and scalp. This step maximizes the conditioning benefits of the oil and leaves your hair feeling incredibly soft and hydrated.
Instructions:
- Heat water to a comfortably warm temperature.
- Soak a clean towel in the warm water.
- Wring out the excess water thoroughly. Be cautious not to burn yourself with hot water.
- Wrap the warm, damp towel completely around your oiled hair, covering from the roots to the ends.
- Leave the hot towel on for 20-25 minutes. The gentle heat will work its magic, allowing for deep conditioning.
Step 3: Hair Wash and Condition
After the steam treatment, it’s time to cleanse your hair and remove the oil.
Instructions:
- Wash your hair with a mild, preferably herbal shampoo. Gentle cleansing is key to avoid stripping your hair of its natural oils, especially after the nourishing oil treatment.
- Follow up with your regular conditioner, focusing on the ends of your hair. Conditioner helps to seal the hair cuticles and add extra smoothness.
- Pat your hair dry gently with a soft towel. Avoid harsh rubbing, which can cause breakage.
- Carefully comb through your hair to remove any tangles. Conditioning should have minimized tangles, making this step easier.
Step 4: Revitalizing Homemade Hair Mask
The hair mask is the final, potent step in your homemade hair spa. It delivers a concentrated dose of nutrients to your hair and scalp, addressing specific hair concerns and enhancing shine and health. This mask utilizes the power of natural ingredients known for their hair-boosting properties.
Ingredients:
- 1 Egg: A powerhouse of protein, vitamins, and minerals essential for hair health and growth.
- 2 teaspoons Coconut Oil: For continued moisture and nourishment.
- 1 teaspoon Olive Oil: To add shine and scalp benefits.
- 3 teaspoons Honey: A natural humectant that attracts and retains moisture, also possessing antibacterial properties beneficial for scalp health.
Instructions:
- In a bowl, thoroughly beat the egg until well mixed. For longer or thicker hair, you may need to use two eggs.
- In a separate bowl, combine coconut oil, olive oil, and honey. Mix well.
- Pour the oil and honey mixture into the beaten egg and blend everything together until you have a smooth, consistent hair mask.
- Apply the mask evenly to your hair and scalp, using your fingertips. Ensure all sections are covered, from roots to ends.
- Cover your head with a shower cap. This helps to retain moisture and warmth, enhancing the mask’s effectiveness.
- Leave the hair mask on for one hour to allow the ingredients to deeply penetrate and nourish your hair.
Step 5: Final Rinse
The final step is to rinse out the hair mask, revealing your revitalized and refreshed hair.
Instructions:
- Rinse your hair thoroughly with a mild, herbal shampoo to remove all traces of the hair mask. You may need to shampoo twice to ensure complete removal.
- This time, skip the conditioner. The hair mask itself is deeply conditioning, and you won’t need additional conditioner.
- Rinse your hair with cool water for the final rinse. Cool water helps to seal the hair cuticles, enhancing shine and reducing frizz. Avoid hot water as it can cook the egg in the mask, making it harder to rinse out and potentially leaving a lingering smell.
Tips for Your Homemade Hair Spa at Home:
- Oil Variations: Feel free to customize your oil blend. Castor oil and sesame oil are excellent additions for promoting hair growth.
- For Oily Scalp: If you have an oily scalp, you can skip the oil massage step and focus on the hair mask treatment.
- Egg Mask Customization: For oily hair, use only egg whites in the mask. For dry hair, use only egg yolks, which are richer in moisturizing properties. For normal hair, the whole egg works wonderfully.
- Mixing the Mask: Always mix honey and oils separately before adding to the egg to prevent lumps.
- Frequency: Start with once a week for the first month, then reduce to once every 15 days for maintenance.
- Assistance: Having someone help with the oil massage can enhance relaxation and ensure even application.
Benefits of This Homemade Hair Spa Therapy:
- Improved Blood Circulation: Oil massaging stimulates blood flow to the scalp, crucial for hair growth and overall scalp health.
- Deep Nourishment: The hot towel treatment aids in deeper oil penetration, providing intense nourishment to the hair roots and strands.
- Protein and Vitamin Rich Treatment: Egg is packed with proteins and essential nutrients that strengthen hair and encourage growth.
- Moisture and Scalp Health: Honey acts as a natural moisturizer and its antibacterial properties promote a healthy scalp environment.
- Natural and Accessible: All ingredients are easily found in most households, making this a convenient and natural hair spa solution.
Embrace the simplicity and effectiveness of a homemade hair spa at home. With regular treatments, you’ll notice a significant improvement in your hair’s health, shine, and strength. Say goodbye to expensive salon treatments and hello to luscious, revitalized locks, all thanks to the power of your own homemade hair spa.